
Redwood forests present one of the most compelling subjects for fine art photography. They are certainly compelling for me. I do not pretend to be an expert here. I only want to offer some insight and guidance based on what works for me. It may not work for you. On Facebook recently, I saw a post from a fellow who recommended using an iPhone's panorama capability—with the phone held in landscape mode to pan a sequoia from base to top—as the "best way to get a single page of a complete sequoia." And he may be right! it's a tough subject to get, And if all you want is a distorted, ground-level "worm's eye view" of the tree, it may in fact be the best way to do so. And if all you have ia an iPhone and pure standing next to the tree, it may be the only way to do so. So, best? Maybe so. Especially if you're trying to capture the sense of the grandeur of the tree, and how small it made you feel. But for me, there is more to these trees than their size. The size is overwhelming at first, and any photographer, serious and/or insta, will wrestle with that, try to grapple with it.
Of course, there is an easy way to show their size and scale: stick a person next to it and call it a day. But for me, for all their size, redwoods beg for intimacy.
These ancient giants create a landscape of scale, shadow, and light that challenges and rewards photographers who understand how to work within their unique environment. Whether you're visiting the well-known national and state parks, or going to some place less well known like Armstrong Woods, knowing how to capture the essence of these forests will elevate your work from casual snapshots to compelling fine art imagery.
What makes redwood forest photography different from other landscape work is the interplay of massive vertical elements, the filtered quality of light, and the inherent sense of scale. A single tree can be hundreds of feet tall, creating compositions that demand thoughtful framing and patience. The challenge and the opportunity lie in translating that sense of grandeur and quiet reverence into a two-dimensional image.
Understanding Light in the Redwoods
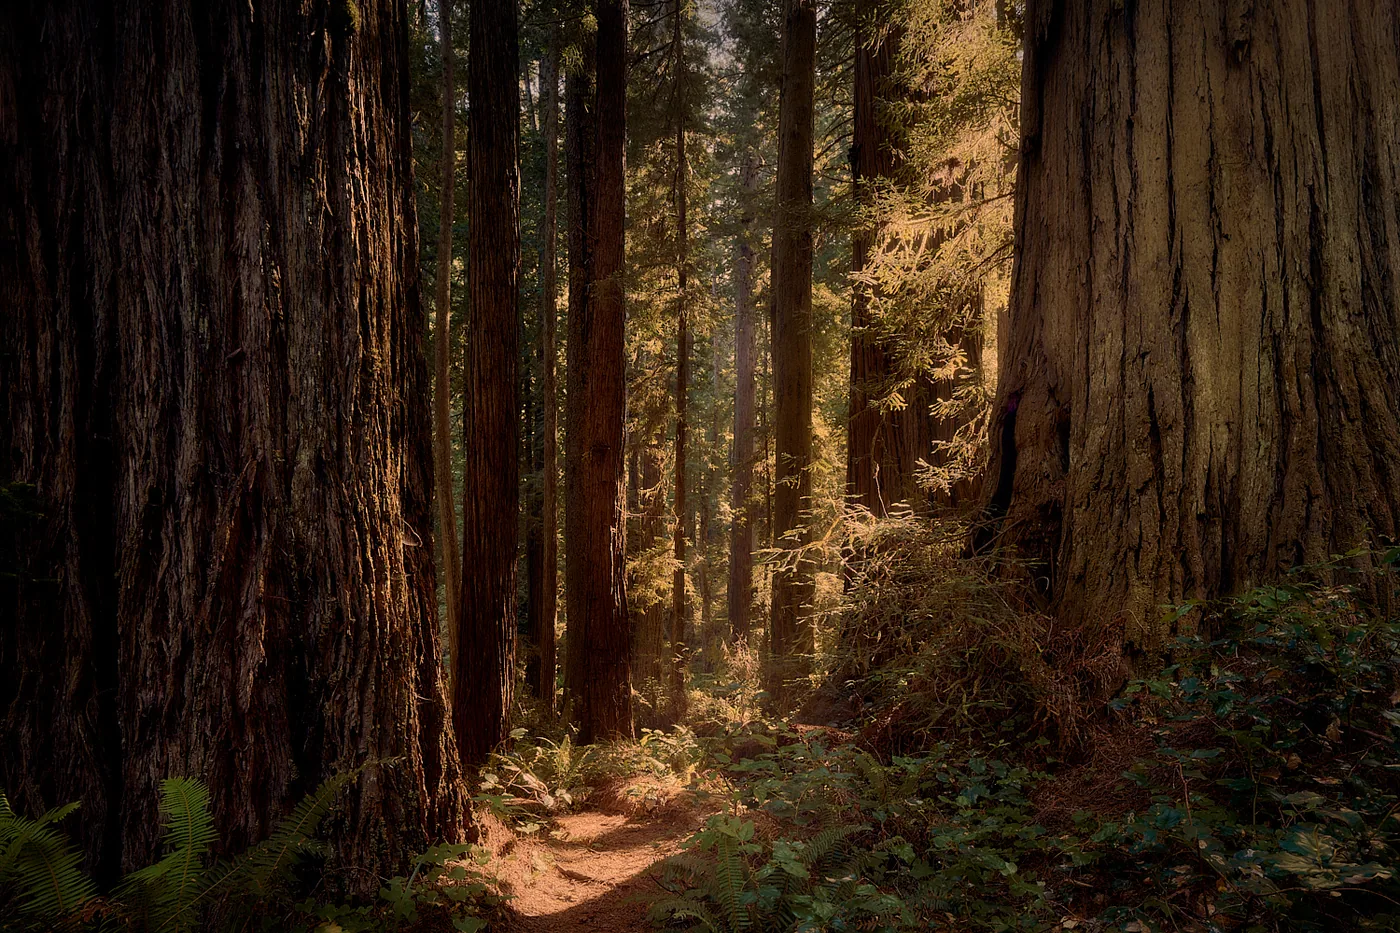
Light is everything in redwood forest photography. The dense canopy filters sunlight into soft, diffused beams that create what many photographers call 'cathedral light.' This is not harsh or direct light, but rather a gentle illumination that reveals texture and depth while maintaining the forest's mysterious quality.
The best light happens during golden hour, either early morning or late afternoon. At these times, the low angle of the sun creates those dramatic shafts of light that pierce through the canopy. The mist that rises from the forest floor in early morning amplifies these rays, making them visible and painterly. If you arrive after rain or on humid mornings, you'll find the atmospheric conditions ideal for capturing that sense of enchantment the forest naturally possesses.
Midday light, while bright, tends to create flat, washed-out images in redwood forests. The overhead sun doesn't play well with the vertical architecture of the trees. Save your shooting for the edges of the day when light becomes directional and dramatic. You may find yourself waiting for the right light, sometimes mere minutes, sometimes even hours; but it pays off with results like this: Hammond Raffetto Art's image from Prairie Redwoods State Park titled "I Went To The Woods . . .."
Composition Strategies for Forest Scenes
Composition in dense forests requires intention. You cannot simply point your lens and expect a compelling image to emerge. Instead, think about leading the viewer's eye through the frame.
Consider these compositional approaches:
- Use leading lines like streams, trails, or patterns in the undergrowth to draw the viewer deeper into the scene
- Frame distant trees using foreground elements like ferns, fallen logs, or closer trunks as natural frames
- Employ depth by placing elements at multiple distances from your lens, creating a sense of space and scale
- Look for clearings or patches of light to break up the monotony of tree trunks
- Experiment with vertical panoramas that emphasize the height of the trees
- Include human-scale elements sparingly, such as a solitary person, to convey the magnitude of what surrounds them
The goal is to create a threshold moment for the viewer, a sense of passage or entry into something larger than themselves. This aligns with how we approach landscape and nature photography at Hammond Raffetto Art: seeking expressions of illumination and scale that reveal the world as something worthy of reverence.
Finding the Right Locations
Not all redwood locations offer the same photographic possibilities. Scout your locations if possible, or research them thoroughly before you go. Look for areas where the forest opens slightly, where water features exist, or where the particular age and spacing of trees create compelling visual patterns.
Old growth redwoods tend to have more dramatic character than younger stands. The thick trunks, the spacing, and the established ecosystem create richer visual narratives. If you're planning a serious redwood forest photography expedition, invest time in getting to know your location across different seasons and weather conditions. Each visit will reveal new compositions and light opportunities.
Technical Considerations
While equipment matters less than vision and patience, a few technical notes help. Wider lenses often work better in dense forests where space is limited, but don't shy away from longer focal lengths that compress perspective and emphasize the density of trees. Tripods are invaluable for steady composition and for allowing you to work deliberately rather than frantically.
Exposure can be tricky in forests where bright sky and dark foreground exist within the same frame. Metering carefully and considering whether you want to expose for the forest floor or the light above will determine your final image. Post-processing that reveals detail in shadows while preserving the magical quality of the light is often necessary.
Patience as Your Greatest Tool
The redwood forest rewards patience above all else. Arrive early, stay late, and return on different days if you can. Watch how the light moves through the trees. Notice how mist rises and falls. Pay attention to the weather forecast and plan around conditions that will serve your vision.
Many of the most powerful forest images come from photographers who returned to the same location multiple times, layering surprise with familiarity until they discovered the perfect alignment of light, weather, and composition. This deliberate approach transforms forest photography from a checklist activity into a genuine artistic practice.
Creating Images Worth Living With
The finest redwood forest photography isn't about capturing a novelty or a tourist destination. It's about creating an image so compelling that you want to live with it, to see it every day in your space and feel transported back to that moment of standing among ancient trees, surrounded by quiet beauty.
When you succeed in redwood forest photography, you're not just documenting a landscape. You're creating a doorway for others to step through, to feel the scale and reverence those forests inspire. You're inviting them to experience the astonishment of briefly witnessing something that has stood for centuries and will likely stand for centuries more.
As you develop your redwood forest photography skills, remember that the goal is not technical perfection but genuine connection with the subject. The redwoods have been teaching light and shadow for thousands of years. Your job is simply to listen and translate what you see into an image that moves people the way the forest moved you.